Boolean
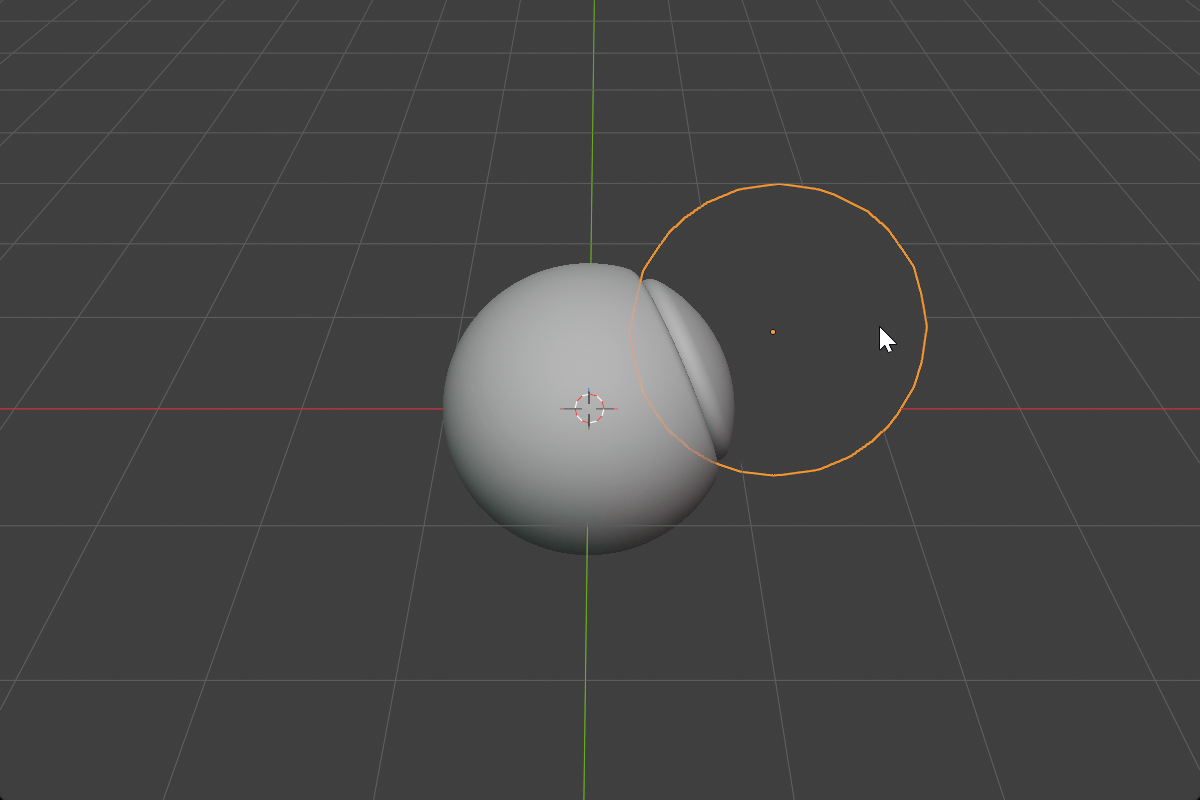
Combine two SDF objects. Chisel booleans operate directly on the distance fields, so the result is clean and re-editable — no mesh repair, no bad normals, no duplicated geometry.
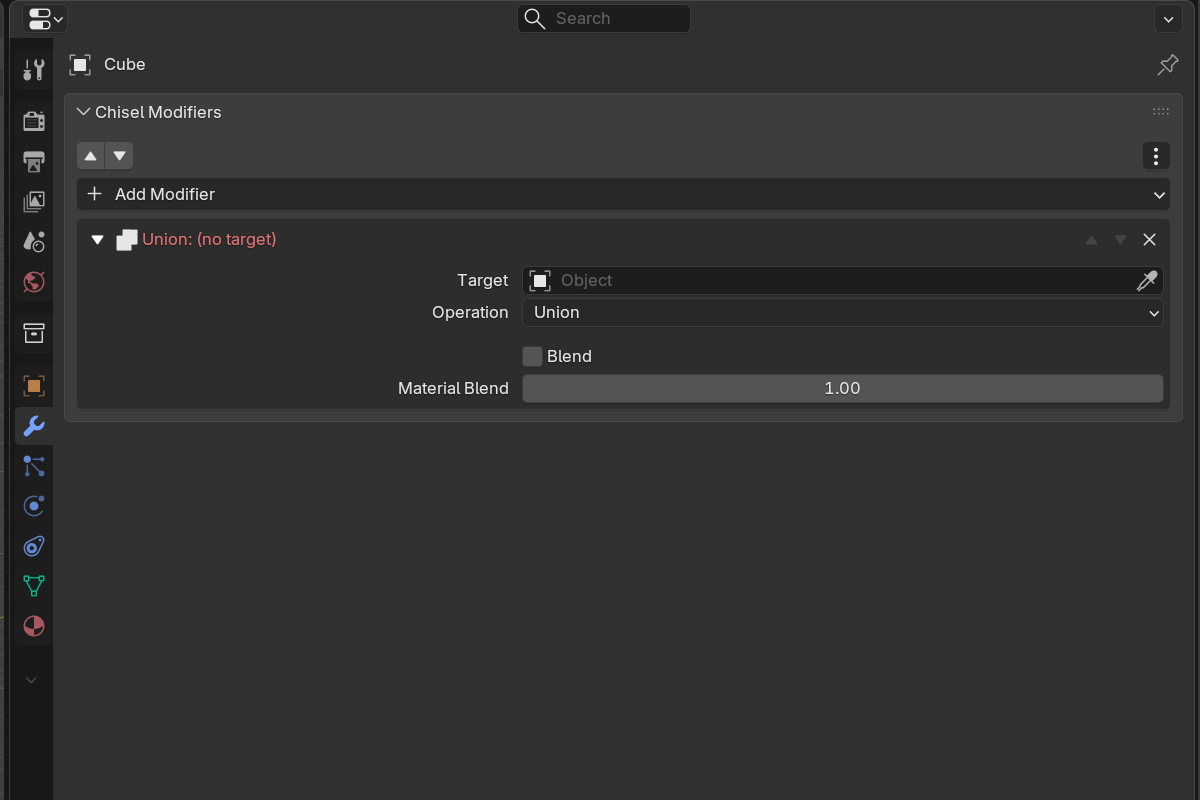
Operations
Union
Combine both shapes into a single solid volume.
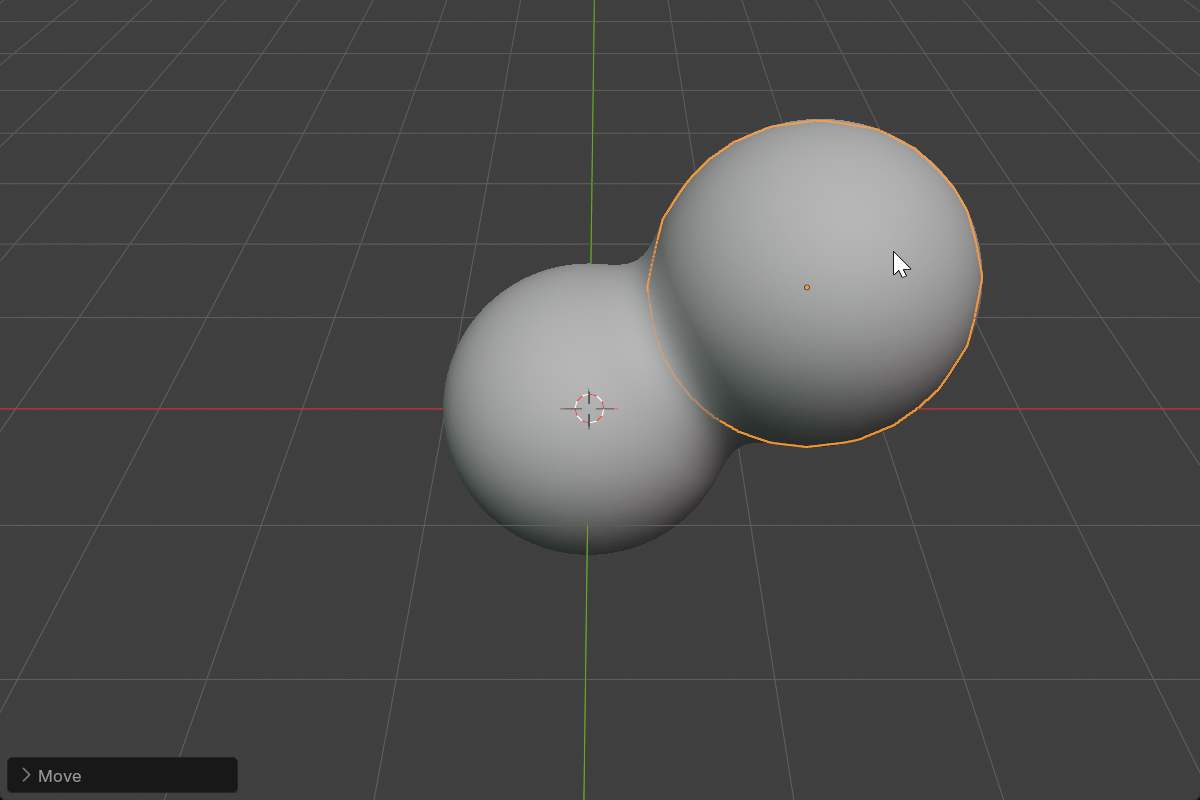
Hotkey: Alt + NumPad +
Difference
Subtract the target from the active object — the classic “cut out” boolean.
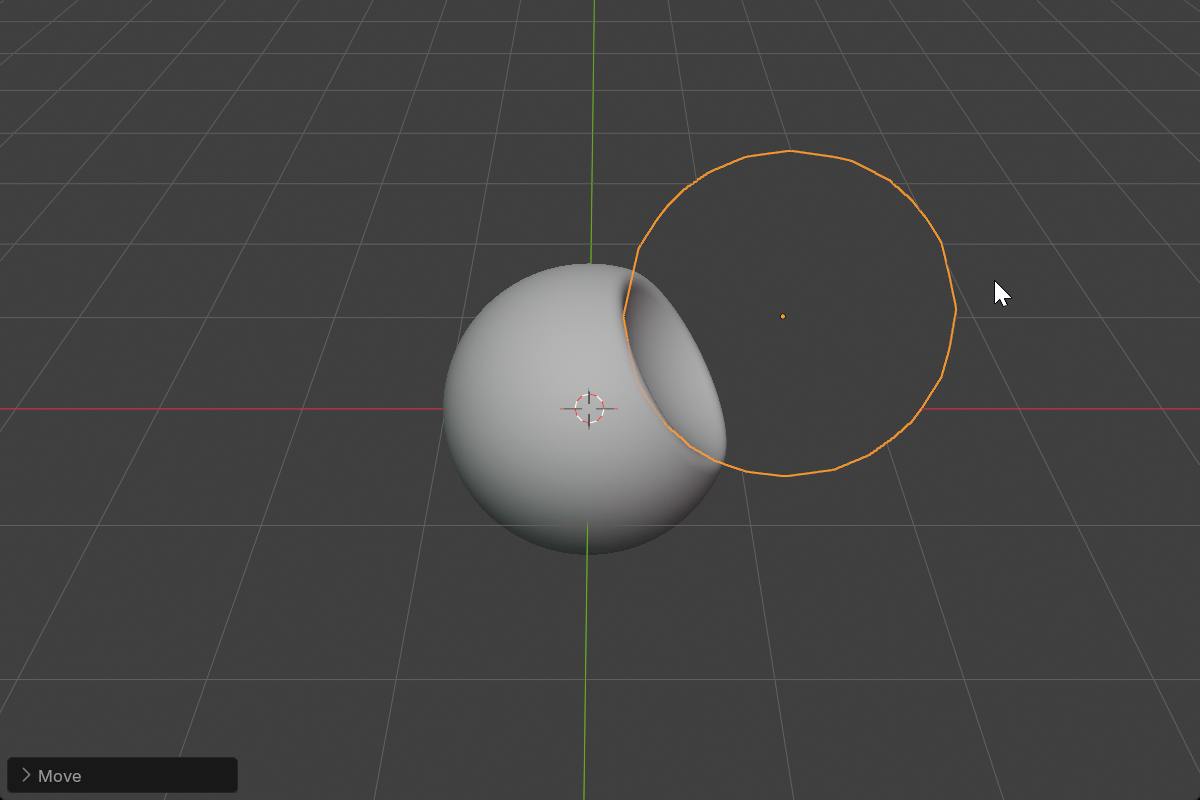
Hotkey: Alt + NumPad −
Intersect
Keep only the volume where both shapes overlap.
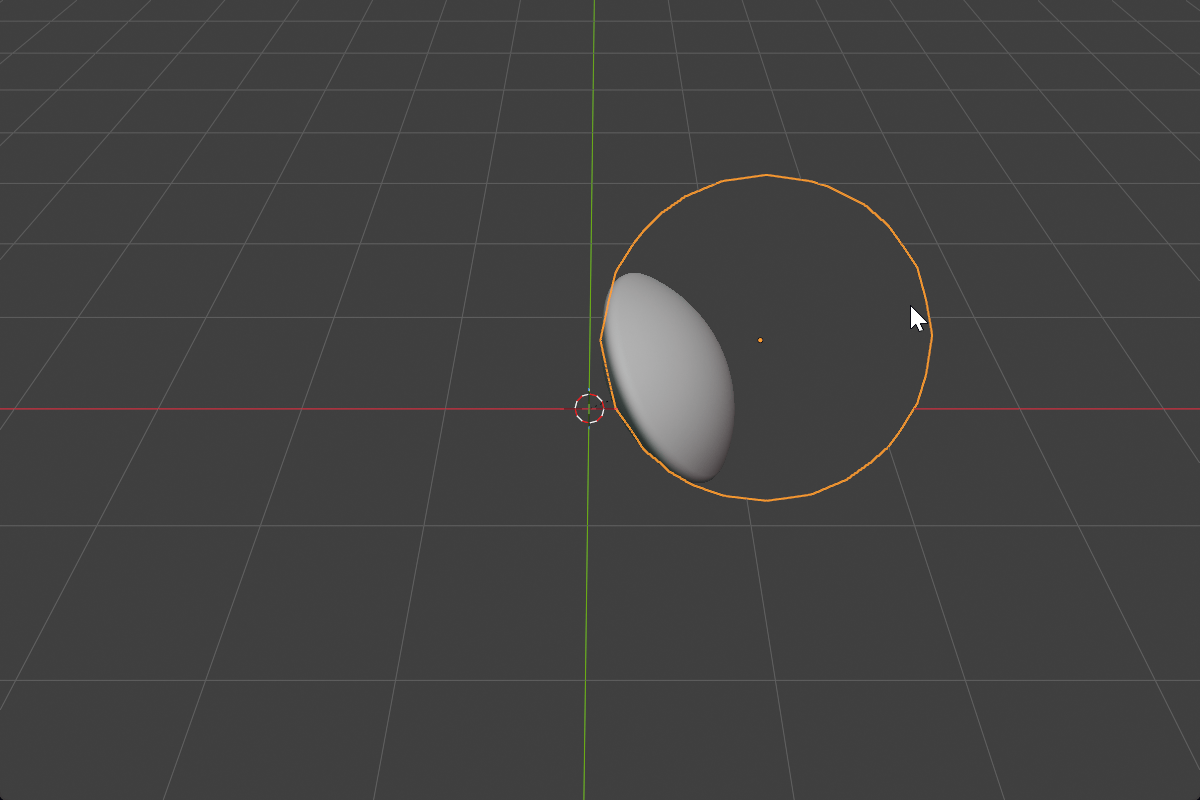
Hotkey: Alt + NumPad /
Slice (tool-level)
Cut the active object with the target and keep both halves as separate volumes. Slice is only available from the draw tool — the Boolean modifier’s Operation dropdown contains Difference, Union, and Intersect only.
Smooth blending
Push the Blend Radius above zero and the boolean seam becomes a smooth fillet — no extra geometry, just math. The fillet shape follows the Blend Profile.
Setup
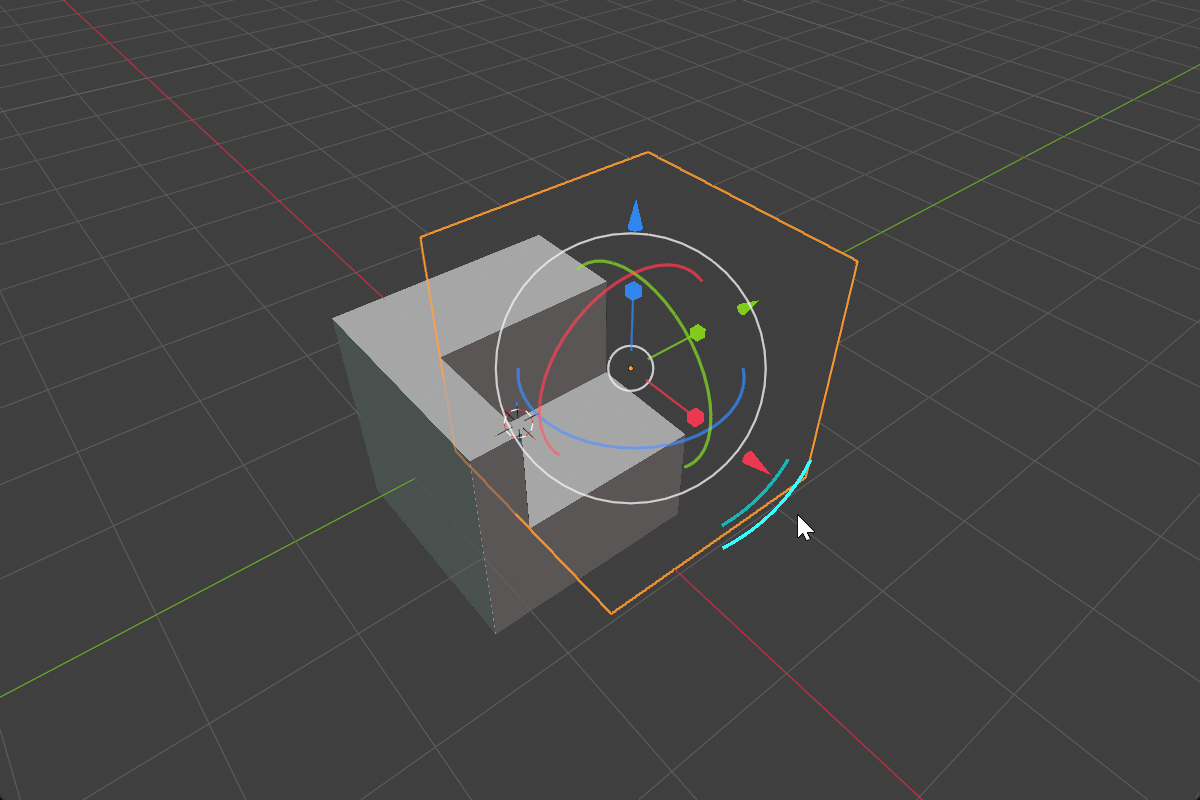
- Select source objects, then make the destination active.
- Add a Boolean modifier (toolbar button, pie menu, or hotkey).
- Set the Target pointer to the operand object.
- Choose the Operation.
- Optionally raise Blend Radius for a smooth transition.
Parameters
- Target — the other Chisel object used as the operand.
- Operation — Difference / Union / Intersect. (Slice is a tool-level operation that creates two modifiers; see Slice above.)
- Blend Radius — fillet radius at the seam (
0.0–10.0, soft max2.0).0.0= sharp boolean. - Blend Profile — Round / Sharp / Soft / Tight / Chamfer.
- Blend Smooth (Chamfer profile only) — softens the chamfer’s outer edges.
- Material Blend — width multiplier for the color blend across the seam (
0.0–10.0, default1.0).1.0= color follows geometry; higher = color bleeds wider;0.0= color snaps even on smooth seams.
When Blend Radius > 0, Use Smooth is auto-enabled. See Rounding & Blending for the profile shapes.
See also
- Mirror — symmetry as an SDF reflection
- Emboss & Engrave — separate inner / outer fillets
- Operations: Clean — detach a boolean operand from the stack